I’ve been super obsessed with making market totes lately. I just love that they are reusable and fashionable at the same time. They are also really easy to make and a real money saver. Plus, you can customize them, which is less than I can say for the store-bought ones. I enjoy taking my totes to the market and making larger ones to take to the beach. My Summer Fun Market Tote is perfect for both! This specific one is a gift for my best friend. I hope she likes it and I hope you like the pattern! Happy Crocheting!
This post contains affiliate links. I do receive a commission if you make a purchase through my link(s), which helps support my blog and allows me to bring you more great posts!
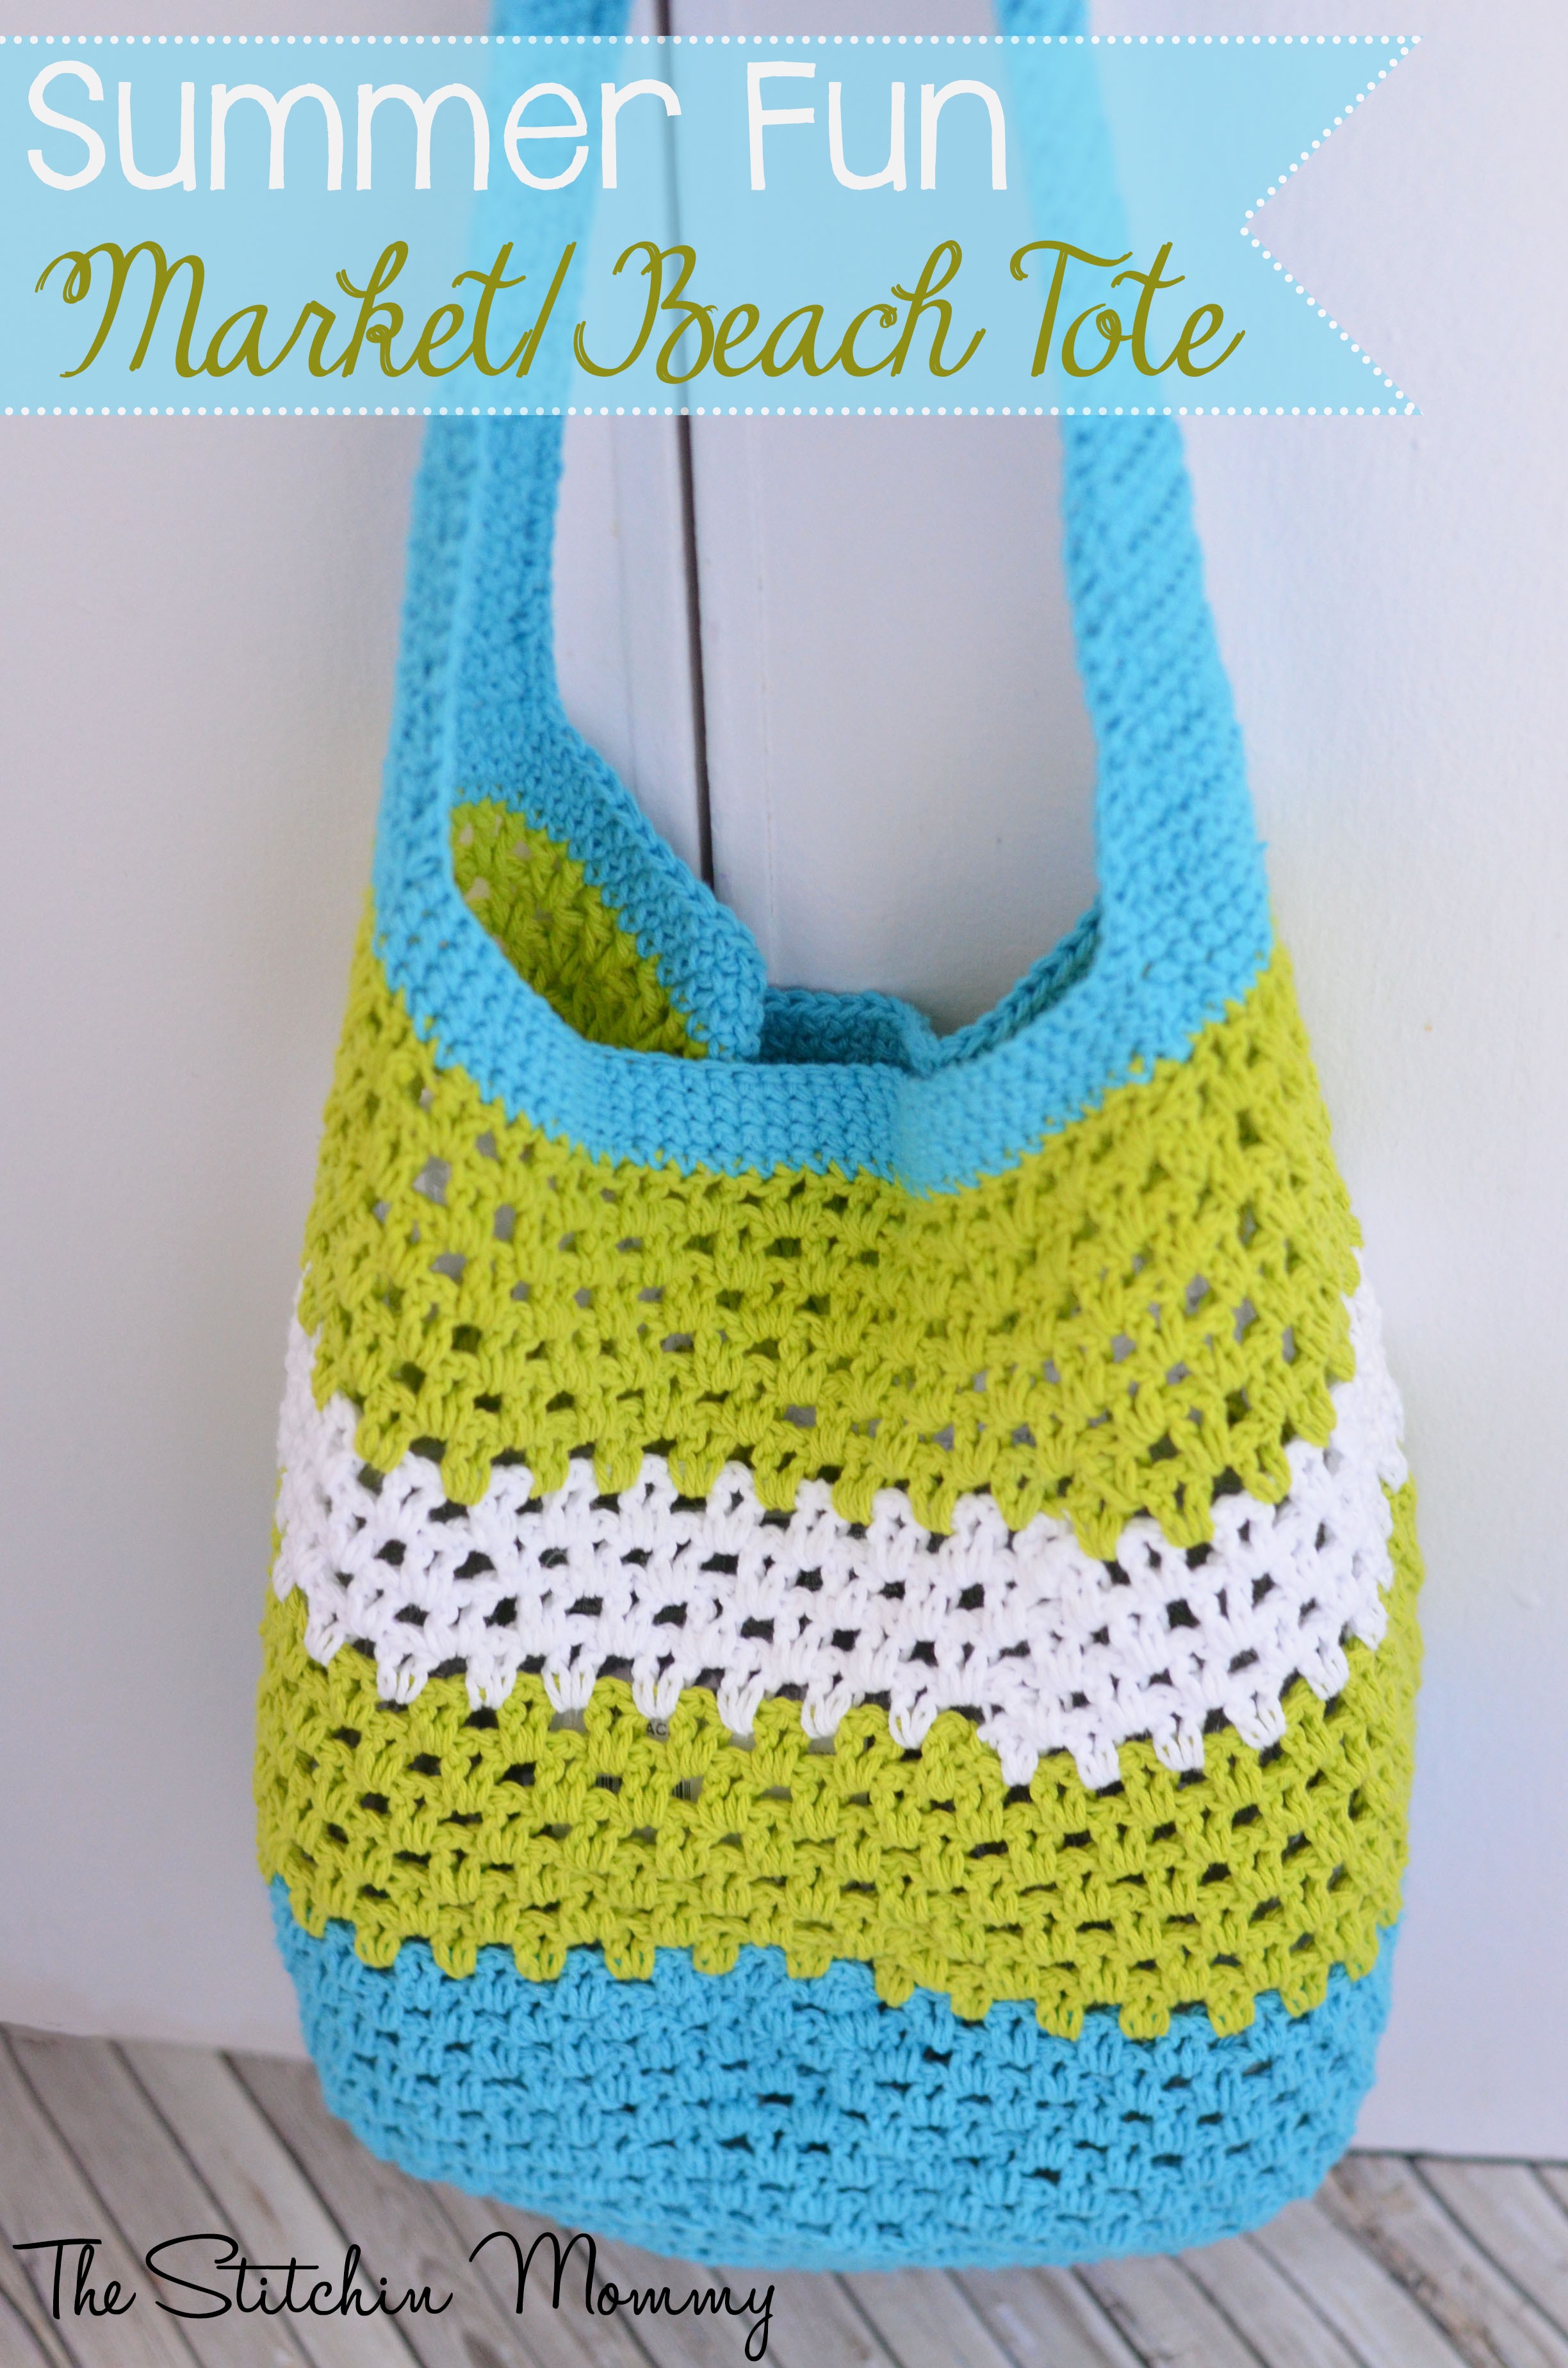
Summer Fun Market Tote
Add to your Ravelry queue and favorites
Skill Level:
Easy
Materials:
- 5 skeins of Category 4 Medium Weight Cotton Yarn:
- 3 skeins (297 yds) of Color A; I used Lion Brand Kitchen Cotton in Tropic Breeze
- 1 skein (120 yds) of Color B; I used Lily Sugar n Cream* in Hot Green
- 1 skein (99 yds) of Color C; I used Lily Sugar n Cream* in White
- Size I 5.5mm Crochet Hook*
- Stitch Marker*
- Yarn Needle*
- Scissors*
*affiliate link
Abbreviations:
dc – double crochet
sc – single crochet
sk – skip
sp – space
() – indicates stitch counts
* – indicates instructions to be repeated
Finished Size:
Measurements of finished tote – 15″ wide x 16.5″ long (from top to bottom, not including handle). Handle measures 14.5″ long
Special Stitches:
- V-Stitch (v-st): [1 dc, ch 1, 1 dc] into designated st.
Notes:
- The stitches in this pattern are worked through both loops unless otherwise noted.
- After Round 8, you will be working in a continuous round. This is where a stitch marker comes in handy. Move the stitch marker along to keep your place.
- This pattern begins with a magic circle. If you are unfamiliar with this technique, you can chain 5 and sl st into a circle.
Instructions:
With Color A,
Round 1: Magic circle, ch 3 (count as 1 dc here and throughout), 10 dc into the magic circle, join in beginning dc with a sl st. (11)
Round 2: Ch 3, 1 dc in the first st, 2 dc into each remaining st around, join in beginning ch-3. (22)
Round 3: Ch 3, 2 dc into next st, *1 dc into next st, 2 dc into next st; Repeat from * around, join in beginning ch-3. (33)
Round 4: Ch 3, 1 dc into the next st, 2 dc into next st, *1 dc into each of the next 2 sts, 2 dc into next st; Repeat from * around, join in beginning ch-3. (44)
Round 5: Ch 3, 1 dc into each of the next 2 sts, 2 dc into the next st, *1 dc into each of the next 3 sts, 2 dc into next st; Repeat from * around, join in beginning ch-3. (55)
Round 6: Ch 3, 1 dc into each of the next 3 sts, 2 dc into the next st, *1 dc into each of the next 4 sts, 2 dc into next st; Repeat from * around; join in beginning ch-3. (66)
Round 7: Ch 3, 1 dc into each of the next 4 sts, 2 dc into the next st, *1 dc into each of the next 5 sts, 2 dc into next st; Repeat from * around, join in beginning ch-3. (77)
Round 8: Ch 3, 1 dc into each st around, join. (77)
Now you’ll be working a continuous round. Use a stitch marker to mark the beginning of each round.
Round 9: Ch 3 (count as 1 dc), sk the first st, *v-st into the next st, sk next st; Repeat from * around until there is 1 st remaining, 1 v-st into the last st. (38 v-sts, 1 dc)
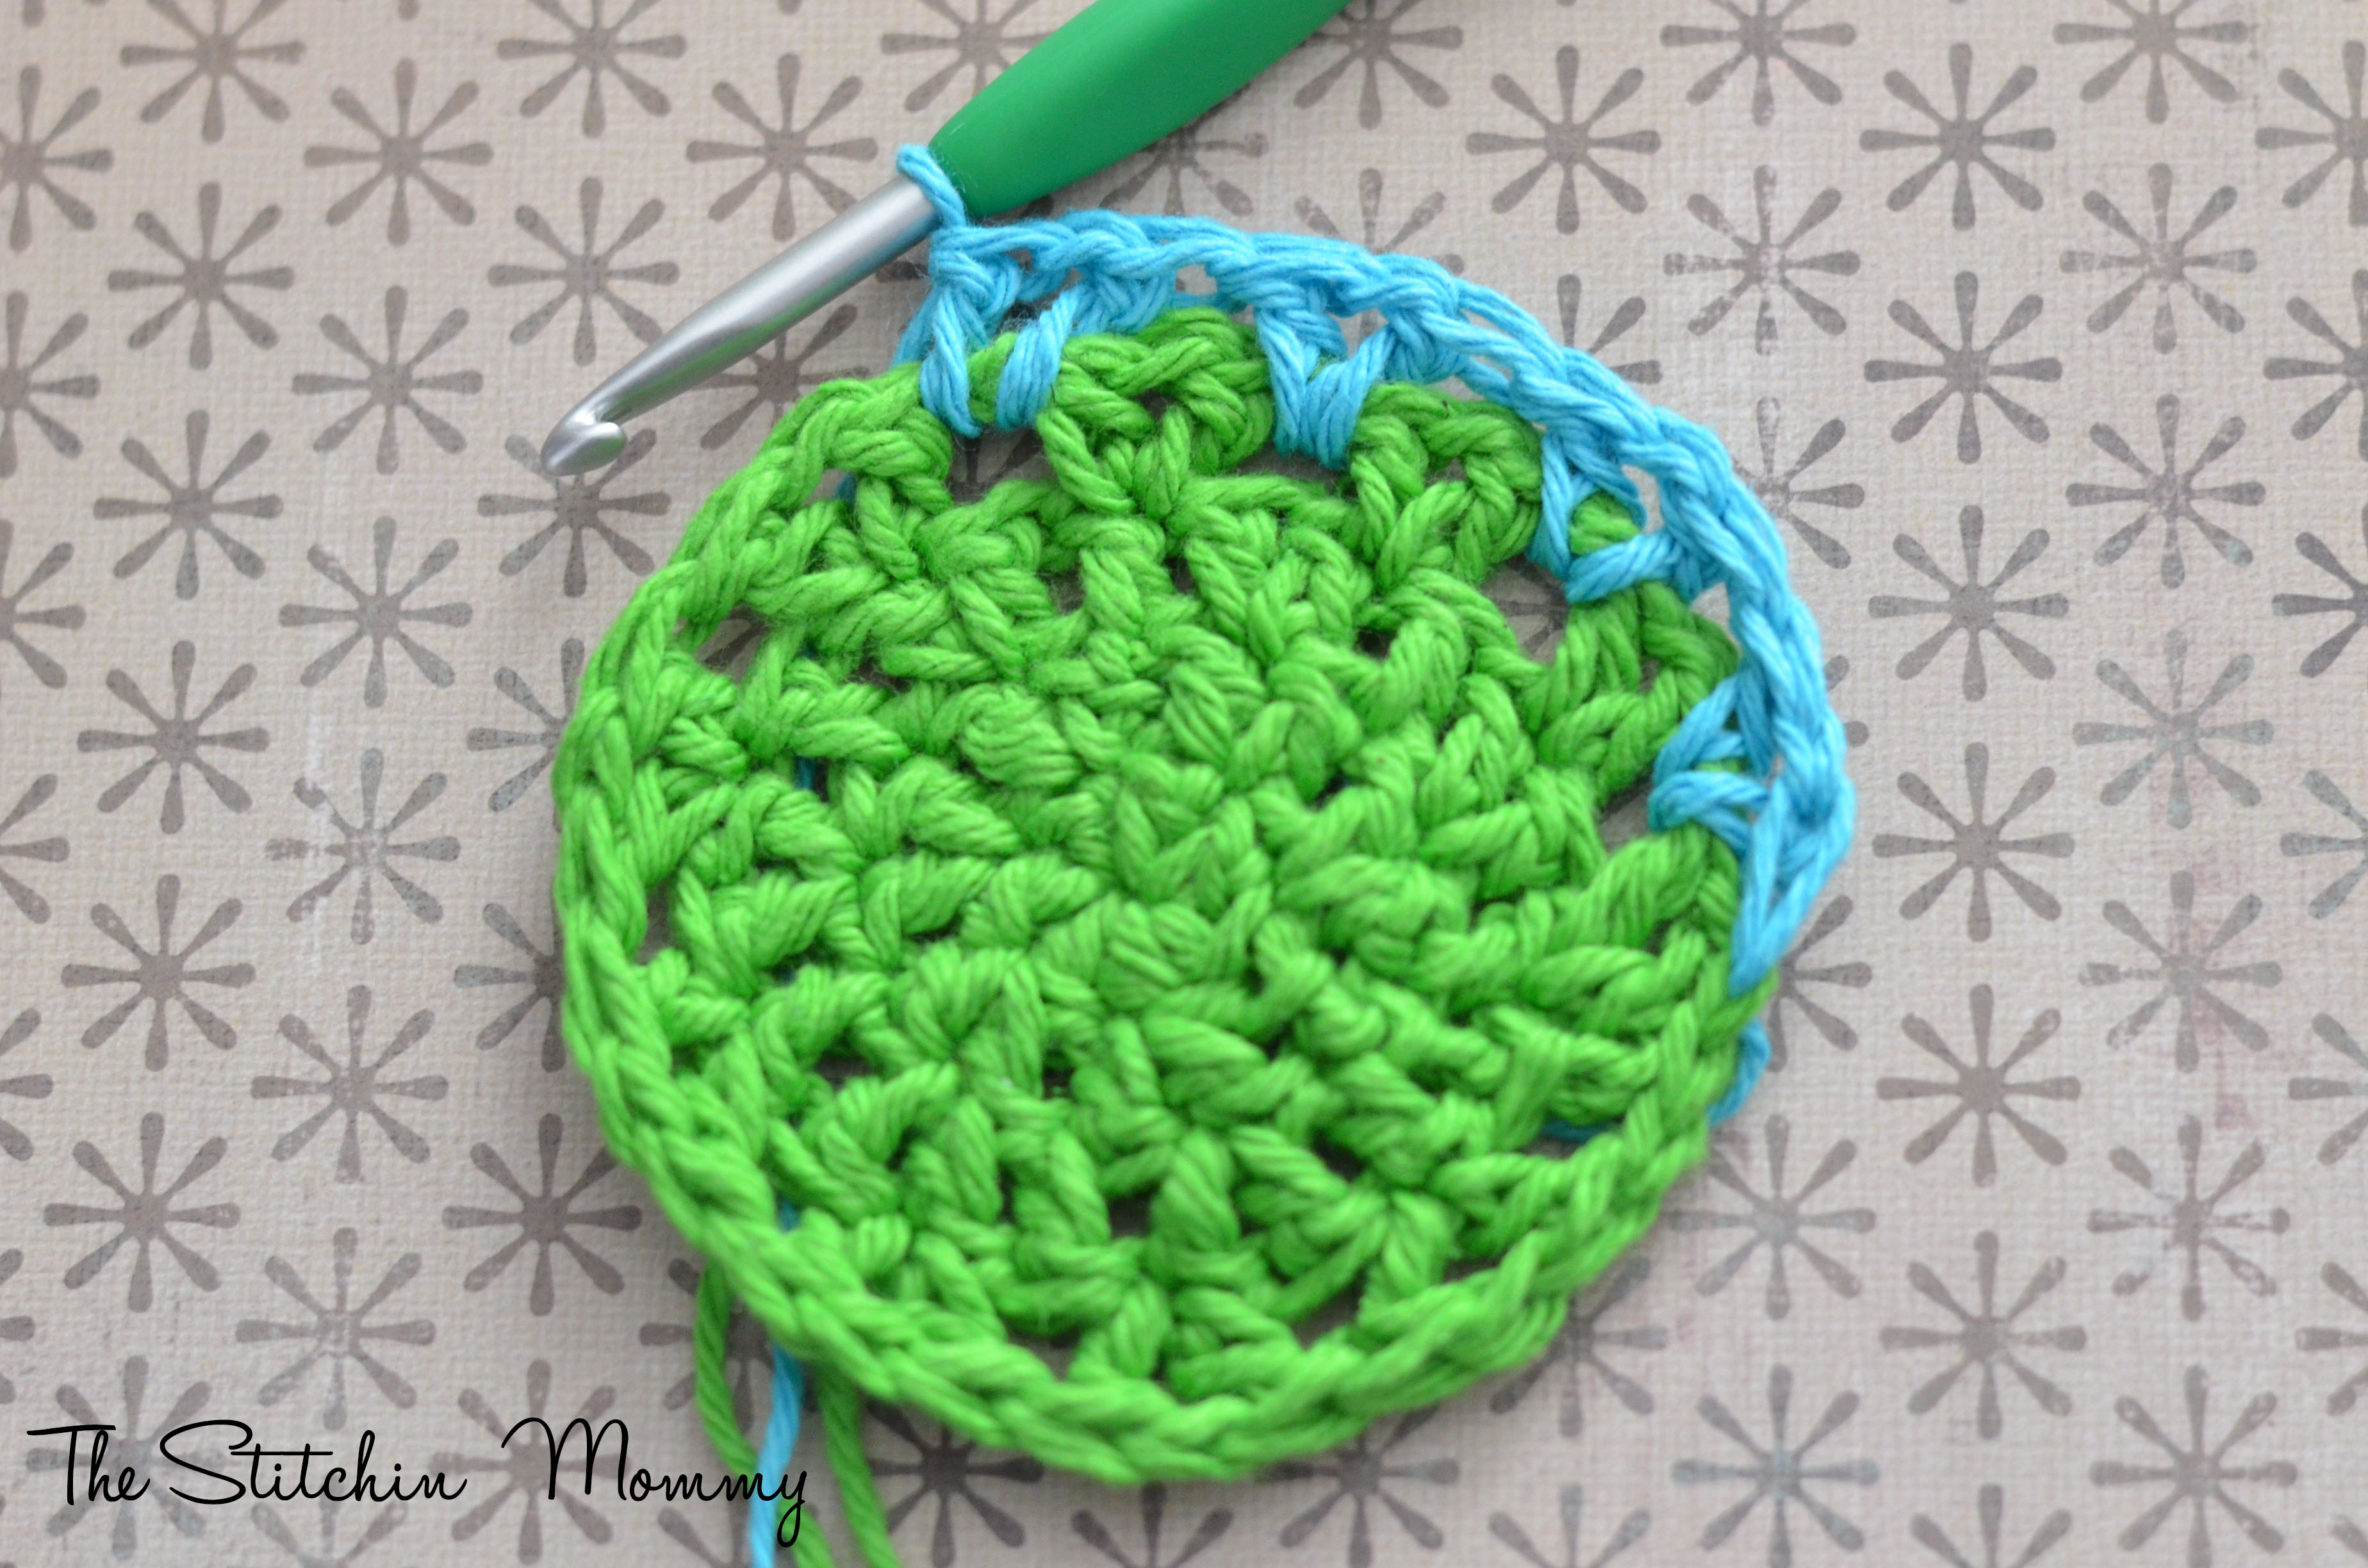
Round 10: V-st into the space between the ch-3 and the first v-st, *v-st into the space between the next 2 v-sts from previous round; Repeat from * around [see example image.] (38 v-sts)
Round 11-15: Repeat Round 10. Change to Color B.
Round 16-20: Repeat Round 10. Change to Color C.
Round 21-24: Repeat Round 10. Change to Color B.
Round 25-30: Repeat Round 10. Sl st into the beginning dc. Change to Color A.
Round 31: Ch 1, 1 sc into each dc around (sk the ch-1 sts), join in beginning sc. (76)
Round 32: Ch 1, 1 sc into each st around, join in beginning sc. (76)
Round 33: Ch 1, 1 sc into each st around, join in beginning sc. Do not fasten off. (76)
Handle
Row 1: Ch 1, 1 sc into each of the next 12 sts, turn. (12)
Row 2-5: Ch 1, 1 sc into each st across, turn. (12)
Row 6: Ch 1, sc dec, sc into the next 8 sts, sc dec, turn. (10)
Row 7-12: Ch 1, 1 sc into each st across, turn. (10)
Row 13: Ch 1, sc dec, sc into the next 6 sts, sc dec, turn. (8)
Row 14-54: Ch 1, 1 sc into each st across, turn. (8)
Row 55: Ch 1, 1 sc into each st across. Fasten off and leave a long tail for sewing. (8)
For the other side of the handle:
Count 26 stitches from the beginning of the first side of your handle. Join yarn, ch 1.
Repeat instructions for first side of the handle.
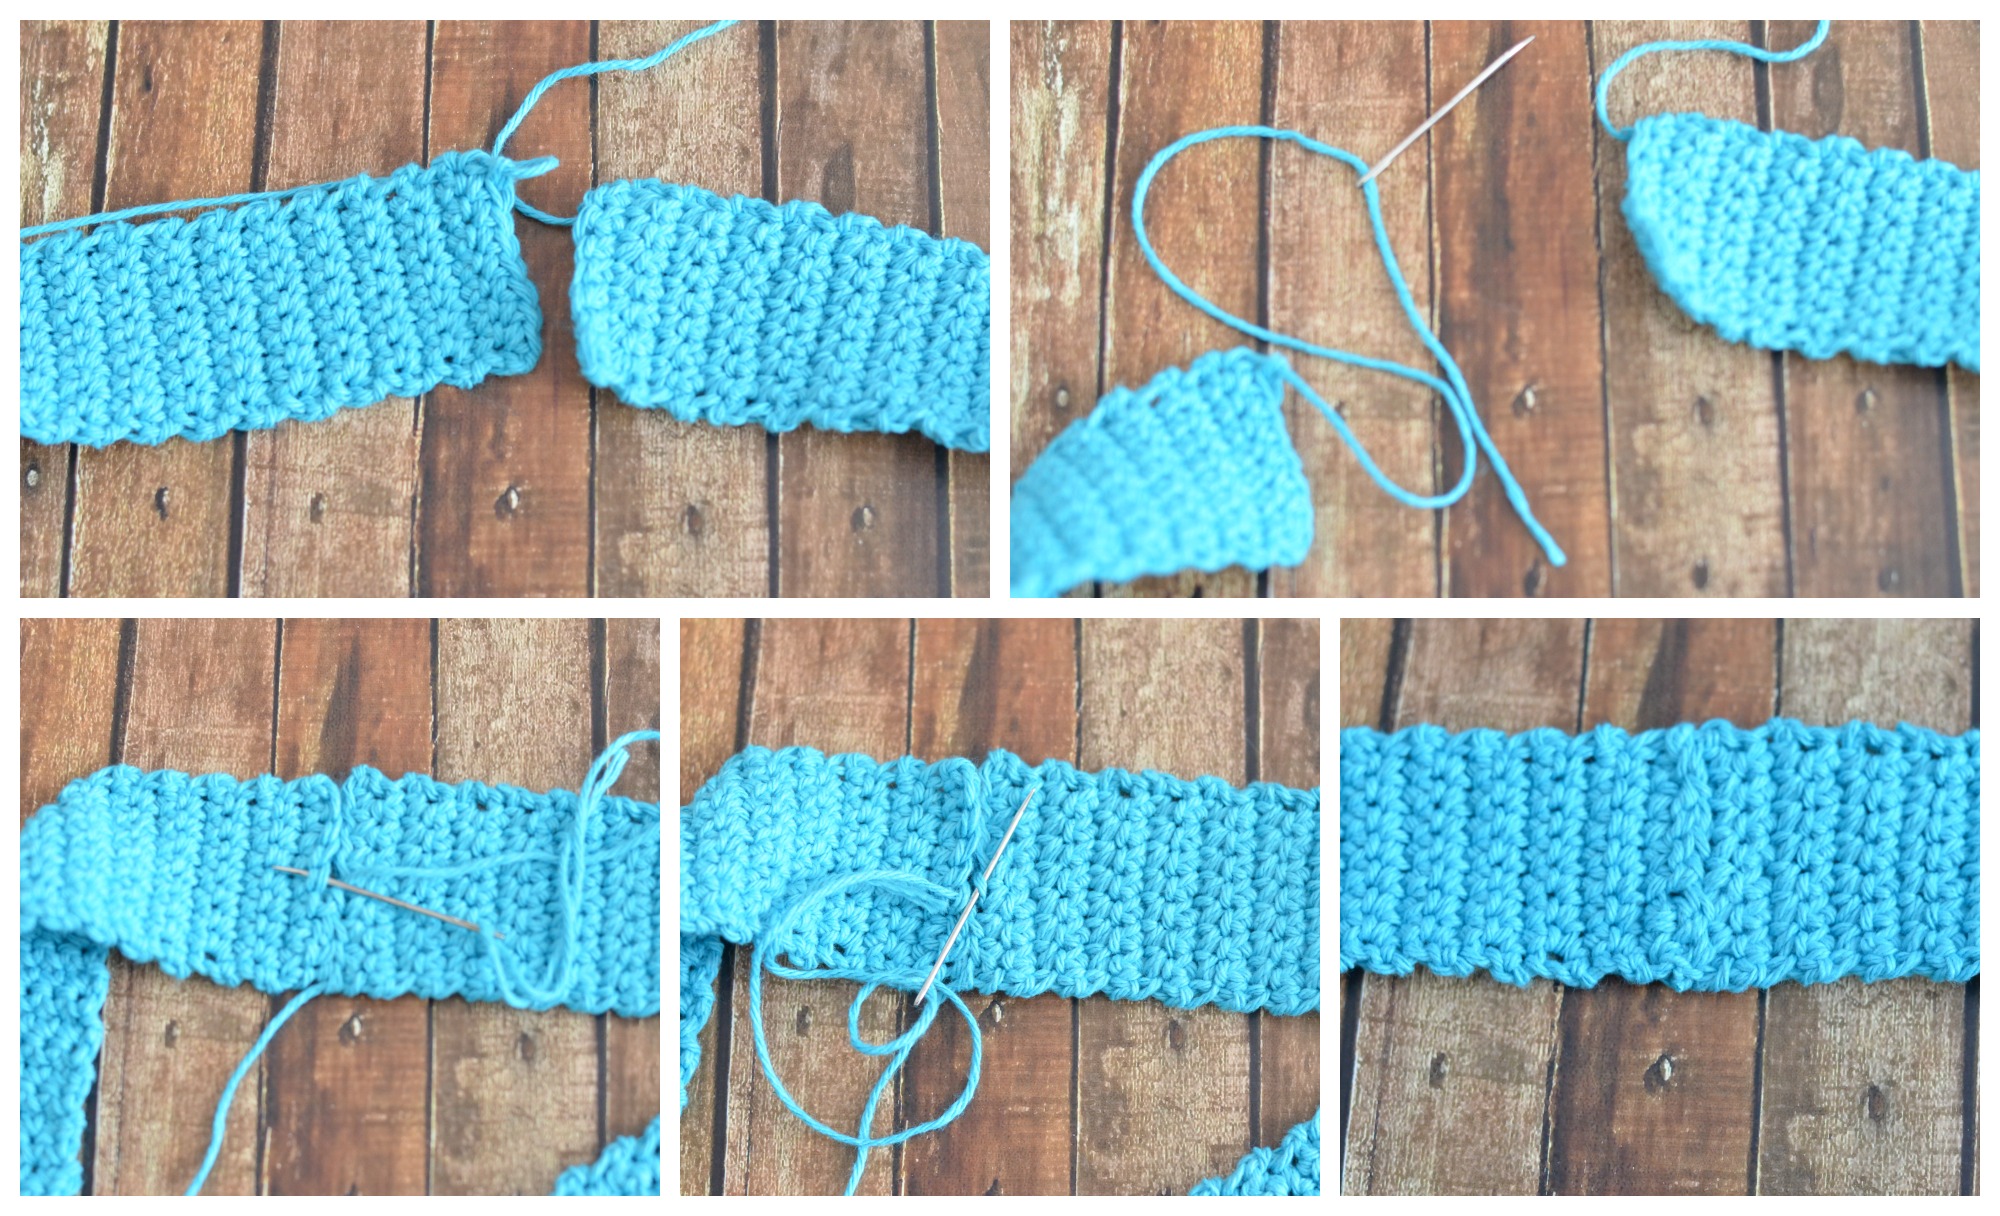
Connect the two parts of the handle together by using your tapestry needle and the tail end of one of your sides. Sew the two sides together on the underside of the handle so that the join isn’t visible on the top.
Trim:
Join your trim color in any stitch on one side of your tote. Sc in each st around, making sure to continue up the side of your handle and back down. Join into the beginning sc. Fasten off. Repeat for the other side of the tote. Weave all ends.
That’s it! Now you can take your tote to the market, beach, or anywhere else! Enjoy!
Terms of Use:
Free patterns found on this site can be used to make finished items for the following purposes:
- For personal use
- As gifts for friends/family
- For charity donations
- For sale online
- For sale at craft fairs, outdoor markets, etc.
When using the free patterns found on this site, please be aware of the following:
- You are allowed sell finished items from the patterns found here. However, you may NOT, under any circumstances, use the photos found on this site for selling your items. If you are going to sell online, you should make your own items and photograph them to represent your own work.
- You may NOT copy and paste the pattern onto your own blog, Facebook, or anywhere else. If you would like to share a pattern, simply share the link to the page instead. You are welcome to copy and paste a pattern into a document for printing or saving for personal use only.
- You may NOT use the free patterns found on this site as teaching material and/or for online classes without expressed written consent from the designer/owner of this page.
- You may NOT use the free patterns found on this site to create video tutorials on YouTube or any other video platform, site, or blog.
- You may NOT post a translation of the patterns found on this site anywhere without expressed written consent from the designer/owner of this page.
- You may NOT PDF patterns found on this site, altered or in its original form, for intent to distribute to others or post on illegal pattern sharing sites. The revenue earned by ad traffic to this site is what allows for free patterns to be written and published. Without people visiting this site to view the patterns, there will be no traffic which means, no more free patterns.
- You may NOT copy any of the free patterns on this site, in part or as a whole, and claim them as your own pattern.
- You may NOT resell the free patterns found on this site, altered or in its original form.
If you have any questions regarding the terms of use of this page, please contact the designer/site owner.
So I’ve almost finished the bag and I’m completely in love with it! Such an amazingly easy pattern to follow! and run! Thanks so much!!
Hi Ashley! I am so glad you enjoyed the pattern. I hope you will share some finished photos 🙂
What size is the bottom of the bag before you start row 9.
Do you think this pattern will work using plarn?
Hi Bonnie! If the plarn is a category 4 weight then it will work out fine. If it is a different yarn weight, you will need to adjust your gauge so that you get the same size bag.
I’m working this pattern but I’m a little confused because it’s not looking like a bag, it lays completely flat like a pizza, is that normal? Other bags I’ve worked start to take a bag shape but they’ve always had more of a long oval bottom than a round one.
Hi Taryn! Have you been working in a continuous round after Round 8? You have to work the remaining rounds without joining after each round. I hope that helps!
I am stuck on starting round 10. I’m not sure where I start. Do I start in the space left by the ch4 or start all the way after the first v st of round 9.
Hi Brooke! I have actually made some necessary updates to this pattern. You can see the current version on the blog now. You will need to work the v-st right after the ch (between the ch and the first v-st from round 9.
Hi. How do we connect round 9 to round 10? It doesn’t say to join after around 9 and do we chain 4 again before starting new V stitches? Thanks!
Hi Jennifer! You will be working in a continuous round so there is no joining unless otherwise noted. You can use a stitch marker to mark the beginning of a round so you don’t lose your place 🙂
Hi, just a couple of questions as I think I am misunderstanding some rows. Row 31 says sc into every dc and ch1 but at the end says (77) stitches but I would have over 100? And row 32 and 33 I thought would be sc all around not into dc and ch1 as all I have are sc stitches?
Hi Angela! I actually just made some necessary updates to this pattern. For round 31, you will need to sc into each dc st around (sk the ch-1 sts). For round 32, sc into each sc st around.
I am just starting off and still learning to crochet, when I come to the end of row 9 do I join with the first one I did on row 9 (the chain 4)? And when I start row 10 do I just go beside the the chain 4 I am really confused
Hi Sammy! You will not be joining after Round 8. You will be working in a continuous round, like a spiral. It would be best to use a stitch marker to mark the beginning of each round so you do not lose your place.
Hi I am having a problem when I get to round 31-31 it says 1 sc in each dc & ch 1 st around, join in beginning sc. In brackets it say you (77) does that mean I should be left with 77 sc stitches. How is that possible if we have been working with 77 v-stitches. We would have more like 231 sc???
Help please
Hi Delores, I have made some updates to this pattern and I have updated the stitch counts. Please see the updates to this post.
Hi, I loved this pattern so easy and quick. Thankyou so much for sharing 😊
Thank you so much Shaz!
Hi
Mine turned out very differently. My v-stitches don’t stagger but are directly above one another. I made the next row of v’s in the chain one space of the v-stitches. Is that what you mean in the instructions? I got to row 30 and realized it’s all wrong. Help? Where did I go wrong?
Thank you so much for the beautiful pattern.
Hi Lyne! I’m SO sorry about that. I had someone helping me with editing and updating my patterns but I think this one was wrongly updated. You should be working the v-stitches in between the other v-stitches from the previous round, not in the ch-sp. I hope that helps!
I belong to a fibre arts group and for our challenge this year we had to pick two crayons out of a bag and make something with those two colours. I picked out a lime green and a hot pink. When I saw your cute market bag I thought it was the perfect choice. I am covering many areas here as I am doing the challenge, picking up crocheting again which I haven’t done in many years and I am making something useful and attractive. I am almost finished. Thanks for the pattern. I have already bought a whole lot more cotton on sale to make more.
I’m sorry. I’m not understanding rows 9 and 10. It says to dc, ch1, dc in next stitch and then skip a stitch. How does that make a ‘v’. I can see that row 10 makes a ‘v’, dc, ch1, dc in same stitch. It’s row 9 that’s throwing me off. Please help.
Hi Summer, you are going to [dc, ch 1, dc] in the next st, then sk a st and then repeat that around. The [dc, ch 1, dc] is the V stitch.
having trouble with the V stitch 🙁
Hi Kayla, what portion are you having trouble with?
I need help. I’m on the second round of “v” stitches and it’s still flat. What have I done wrong? Will it take the shape of a bag later? Thanks
Hi Alicia, I am sorry for the late reply. It usually starts picking up after a few rounds. The stitches are loose so they tend to fall flat until there are quite a few rounds to make it more stable. I hope this helps!
Does this cotton bag need any special care? I made some washcloths out of the lily sugar and cream once. After the first wash and drying, the colors had faded and dulled. I love this bag and any experience you can share on the cotton yarn would be appreciated!
Hi Gloria! For all of my handmade items, I handwash them in cold water with a little white vinegar and a mild soap. I squeeze out the excess water and lay flat on a towel, shape it, and air dry. I find that with machine washing and drying, it wears the fabric out more.
That’s easy enough —- I look forward to making this. Thank you for your help!
I tried making this bag , but the sides are not curling up like it should …what am I doing wrong ?
Hi Cindy! What round are you currently on and are you working in a continuous round? After round 8, you should not be joining anywhere but working in a spiral instead.
I love this bag….the colours are magnificient!
Thank you so much Patty!
Why do I make two sides of the handle instead of making it the length I want and attaching it to the other side. What am I missing.
Thanks,
Kathy
You can make the handle however it is comfortable for you. This is just the way that I like to do it to make sure it’s even and that it’s attached in the right place.
Thanks. Just wanted to make sure I was getting it right.
No problem! If it’s easier for you to make the whole handle and attach it at the other end, go for it! 🙂
Thanks for the fun pattern! I made one of these for my mom. She loves it!
I’m so glad she loved the market tote! 🙂
Got all the way to row nine and am lost…..You say no chains or joins but you say dc ch1 etc…..cannot figure out this V stitch! I am determined to make this….Can you explain? Sincerely, Anita
Hi Anita! At the start of row 9, you are no longer joining and chaining up to start the next round. You will be working in a continuous round so you will most likely need a stitch marker to keep your place so you know where the beginning of the round is. The V stitch in this pattern is dc, ch1, dc all in the same space. Then, you will skip the next stitch and do the same thing again, (dc, ch 1, dc) in the next st. When you get to the end, do not join to the beginning. You will keep going around in a continuous circle from now on. I hope that helps!
Ok I’m trying to make this bag, but it doesn’t seem to be moving upwards..it looks like a big doily. I can’t figure out what I’m doing wrong. Please any advice?
Hi Heather! Are you making sure to work in the round (not joining)? What round are you up to? After round 8, it will start curving and start forming the bag.
Thanks for the pattern!
Hello –
Thank you very much for the pattern! What is the best way to enlarge the bag to make it more beach tote-like?
Thanks!
Hi Alexis, I would keep increasing after round 7 until you get the desired size. If you want to add maybe 2 more rounds of increases, it would go like this: Round 8: *1 dc into each of the next 6 sts, 2 dc into next st.* Repeat * around. Join. Ch 2 (88)
*1 dc into each of the next 7 sts, 2 dc into next st.* Repeat * around. Join. Ch 2 (99)
Then you would continue on with the original Round 8 now Round 10 and so on.
On round 9, it says “repeat between * and **- but should I be skipping a stitch after each “dc ch1 dc”? Or literally only skipping one stitch at the beginning? Thanks!
Hi Melissa! It should actually be *dc, ch 1, dc in next st, sk next st** so you should be skipping a stitch after each dc, ch1, dc. I hope that helps!
Hi, at the end of round 9, where should I put my next stitch? I crochet w/o joining but it gives an ugly out of shape hole. Can advise me?mthanks.
Hi Joyce, for round 10, you will be placing your next v stitch in between the v stitches from round 9. Please see the image that is shown for round 10.
Hello,
I am new at reading and understanding patterns.
I am so confused with going from round 8 to round 9. After I finish round 8 and ch 2 where do I start the V stitch? And where does round 9 end and 10 begin?
Thanks.
Hi Keri, after you complete round 8, you will work round 9 into the stitches from round 8. After round 8, the pattern is worked in a continuous round instead of joining and chaining. You will need a stitch marker to keep your place so that you will know where the rounds end.
Does the first v stitch start in the same stitch where I chained 2 to end round 8? Or do I do the first v stitch in the next stitch after the chain 2?
Thanks
Kerri
Hi Kerri, you will start the v stitch in the next stitch after the chain 2
Love this bag! So easy to make and so much fun to use!
Thank you Stacey! 🙂
Hi Amy,
I started making this bag and I’m a relatively new crocheter. I had a question about when you start Round 9. When you complete that round and go to Round 10, do you chain 2 and than start round 10 or are you making a continuous round. I hope that made sense. I just confused about transitioning to each round. Thank you
Hi Lisa! When you start round 9, you will be working in a continuous round like a spiral. There are no joins or chains. I hope that makes sense!
Thanks and makes sense!
p.s. I love this bag
Glad it makes sense. Thank you! 🙂
Hi Amy
It’s a beautiful Market Bag. Does the Ch 2 at the round 1 count as a double crochet? I am a beginner. Thanks!
Marcia
Thank you Marcia! I actually do not count the ch 2 as a double crochet.
Hi Amy, I’ve been reading about how awful the cotton yarns look after washing (for example, dishcloths). One person suggested rinsing in a vinegar and water mixture prior to washing. You said you have a lot of cotton yarn. Do you have colors running as a problem? thanks.
Hi Wendy! Sorry for the late reply. I don’t have too many issues with my colors running because I treat my projects in a vinegar bath. I soak them in a vinegar bath of about 1 cup of vinegar with about a gallon of water for 30 minutes and then rinse it with clean water until the vinegar smell is gone. Once it dries, the color should no longer run.
How many stitches did you use in the magic circle?
Hi Colette, as per the pattern instructions, there are 11 dc in the magic circle. If you need a tutorial for the magic circle, you can find a great one here
I love this beach tote!! Thanks for sharing.
Thank you Patricia!
I love this bag! And it gets me thinking about spring/summer in the middle of a cold snap!
Lovely pattern, I especially appreciate the width on the handle. I’m always on the lookout for my next market bag.
Beautiful!!
Loving the colours on this bag….beautiful!
What is the best way to change colors? Never changed colors working in continuous rounds before.
Hi Heather! There are so many different methods for changing colors. I personally like to change colors by pulling the new color through the last loop on the hook when it’s time for a color change and then fastening off the other color. You can also join the new color by fastening off the current color in the last stitch and joining the new color with a slip stitch.
Thanks for explaining that the pattern is in continuous rounds. Luckily I don’t have to frog too much of the mesh part. It just wasn’t looking right. Looking forward to customizing them for gifts. Have you ever made this pattern with acrylic yarn?
No problem Heather! I have never made it with anything but cotton yarn because I usually have a ton of it around. If you make it with acrylic, I would love to see how it turns out!
what is a magic circle ? looks like a wonderful tote bag cant wait to get started. thank you
Hi Evelyn, a magic circle is an alternate to chaining and forming a circle or ring. It’s a great technique that leaves a smaller “hole” in the middle of your work. You can find many great videos demonstrating the technique on Youtube.
Beautiful bag, i’m just about done but think I did something wrong. Can you please tell me how many stiches there shoul be after completing row 33
Hi Christine! I looked at my sample and I have a total of 105 stitches.
I love this pattern. I am making one as a gift for my cousin and one for myself! I do have a question, once you start the mesh section, do you join each round and chain 2 or work in continuous rounds?
Hi Sally! I’m glad you like the pattern! You will be working in a continuous round. 🙂
I have a ton of Lily Sugar & Cream I bought on sale that I’ve been looking for a use for. This looks great!
That’s my cotton yarn of choice 😉 Hope it turns out great!
I just finished this pattern. I loved making it! It turned out beautiful too. Will be making more of these!! Thank you so much for the awesome pattern!!
Thank you Anne! Glad you liked it 🙂
Thank you for sharing! It’s the perfect size and like you said, totally customizable! I’ve been knitting more than crocheting lately so this should be fun. And hopefully quick-because, here in WA state (in a few counties) those ugly, never dying plastic bags have been outlawed and I’d like to make a few market totes for those who haven’t already changed & still been using those yucky plastics!
thanks again 😀
They are charging for the plastic bags in some places in NY too. I like using the cloth bags better. It makes me feel like I’m saving the environment 🙂
It’s been a while since I did any crocheting, but this looks like a great place to get back in to it! Thanks for sharing…I love this!
Thanks Jodee! I hope you pick up your hooks soon 🙂
This is beautiful! Thank you so much for sharing the pattern. It’s officially the next item on my to-WIP list! 🙂
Thank you Amanda! I hope I get to see how it turns out! 🙂